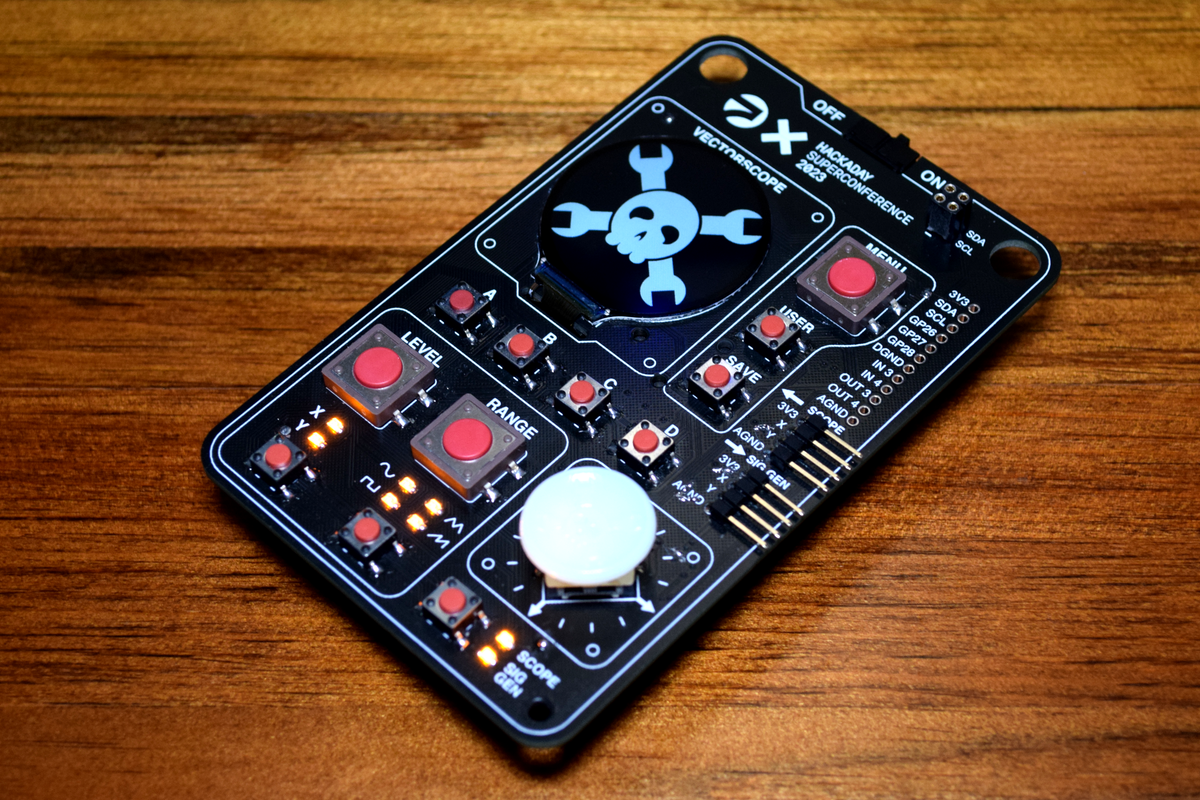
Hackaday Superconference 2023 Vectorscope Badge
Related articles
Getting started
IDEs
Thonny
This is a relatively simple IDE, more or less designed specifically for MicroPython, and does most of the stuff you would need, without hiding functionality.
It's pretty easy to install at get started with, not least because you can access and open up files directly on the badge, edit them and save them back on the badge.
See the Thonny getting started for a little more info.
VSCode and the MicroPico extension
If you already use VSCode, the MicroPico extension and a few other recommended extensions might be an option, especially if you are used to have projects and work with both a set of files on you computer and on the badge. There is a bit more setup required to get going, but you get a bit more functionality in areas like code completion and direct access to documentation for various functions.
See the VSCode getting started for a little more info and setup help.
Your favorite text editor and mpremote
If you don't like integrades development environments (IDEs), you can also use your favorite text editor and mpremote for communication with the badge.
We have a few tips and tricks with mpremote to get you started.
Repository overview
Firmware
This folder has the MicroPython firmware for the Raspberry Pi Pico on the badge in a special edition, that includes the driver for the GC9A01 display controller and some of the latest additions needed for DMA on the RP2040.
The .uf2 file can be used to restore the badge, if you have tried other code and want to revert back to the original state. In addition to the .uf2 firmware file, you will also need the original MicroPython code and assets for a full restore.
Hardware
The hardware folder is where you will find all the details about the main PCB, the expansion board and the parts that are on the main board. There is schematics as a few images, and data sheets for the parts used. Especially the Pico datasheet or the pinout can be usefull as a references, if you want to have a go at doing some hacks outside of the normal.
The design is done in Altium Circuit Maker and in addition to the board file, there are also Gerbers, drill files and a BOM, in case you want to make your own or maybe just have a peak and check some traces.
There is also a WiP (Work in Progress) version of the board file i KiCad format. It's not perfect as some of the conversion didn't go perfect (eg. incorrect ground plane size and connections), but for mechanical use (eg. case design) it should be OK, though not all 3D models are available in the default KiCad repository.
If you want to build you own based on the Gerbers here some notes:
- T1 needs to be solderd flipped (deadbug) and rotated. Like in this image. You see the backside of the Fet. Pins need to get bend a little bit.

Inspiration
We'd been thinking of doing something analog this year, because we've been heavily digital with the 2019 FPGA badge and last year's virtual retrocomputer. [Sebastian Holzapfel]'s Eurorack FPGA frontend showed us how to abuse the AK4619 ADC/DAC chip for DC voltage purposes, and our path was clearer still.
Finally, [Schneider] showed us the prototypes for the flow3r badge for this summer's Chaos Camp in Berlin, and we needed to make a vintage round-screen scope. Besides, we'd been looking for an excuse to try out those round screens since seeing [Scott Bezek]'s SmartKnob. How could we resist?
Related projects
- BASIC-2 enclosure by Tina Belmont