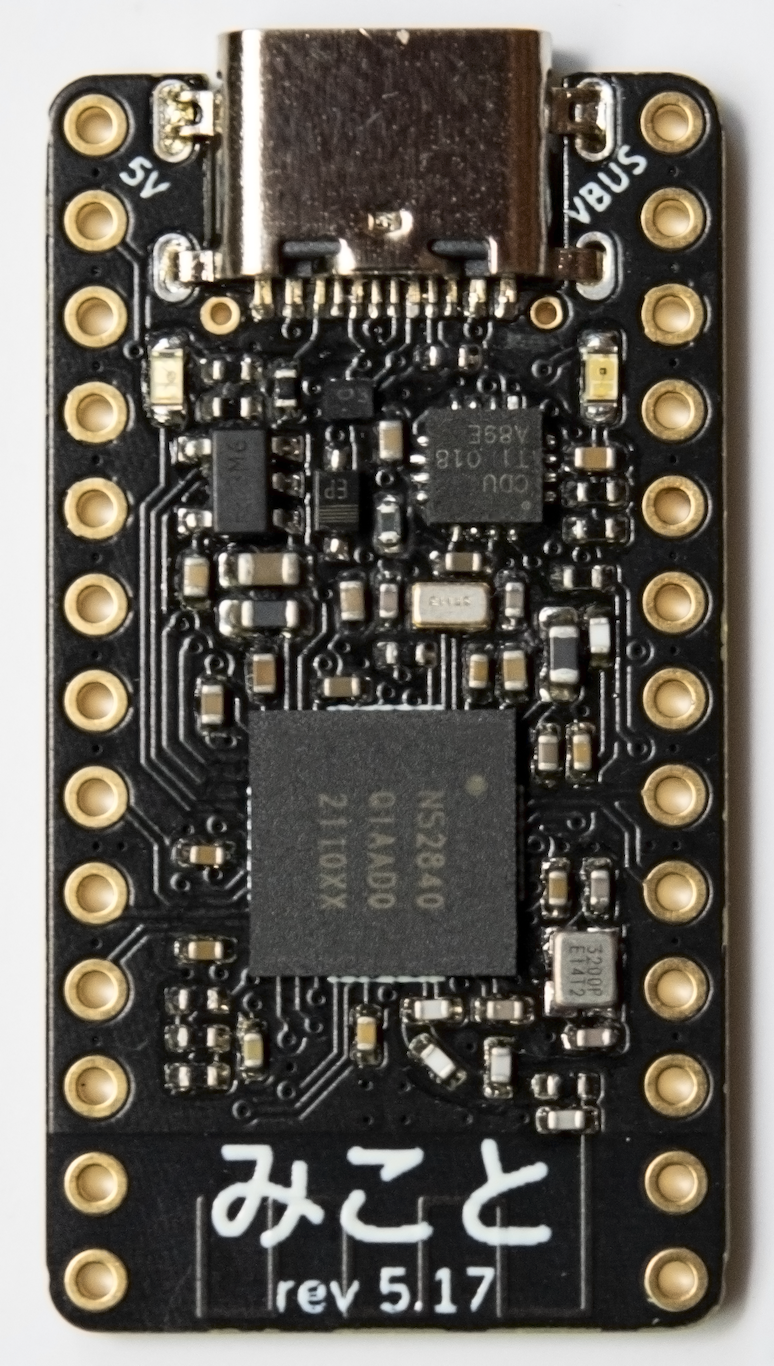
みこと
nRF52840 microcontroller, in a pro-micro footprint, inspired by the nRFMicro and nice!nano.
See the changelog for the revision history (and compatibility)
picture
what
- VDDH power path (5V USB power, and/or 3.7V Li-ion battery)
- software controllable battery charge current (off, ~100mA, ~250mA, ~350mA)
- ESD protection on USB lines, and 500mA fuse protection for VBUS and EXT_5V
- "Bidirectional" power over EXT_5V
The charger IC is "software controlled"; there are two pins (P0.26 and P1.15) that can be toggled (for a total of 4 combinations) to control the charge current. If they are both high-Z (floated), is disabled.
There are also two additional through-holes (the small ones below the USB connector), marked B and G (on the back side); these are B+ and B- respectively, in case you want to solder the battery leads directly to the board.
Note that the project files require KiCad 6.0.
ext_5v
The EXT_5V pin acts both as a power input and a power output; normally it is an input. When VBUS is high (ie. USB is connected), it will output VBUS (minus a schottky drop, ~0.3V).
EXT_5V is connected to the battery charger, so if you wire your TRRS (for split keyboards) to it (instead of a 3.3V VCC line), you can charge the battery on both halves by only plugging in one half to USB.
production & assembly
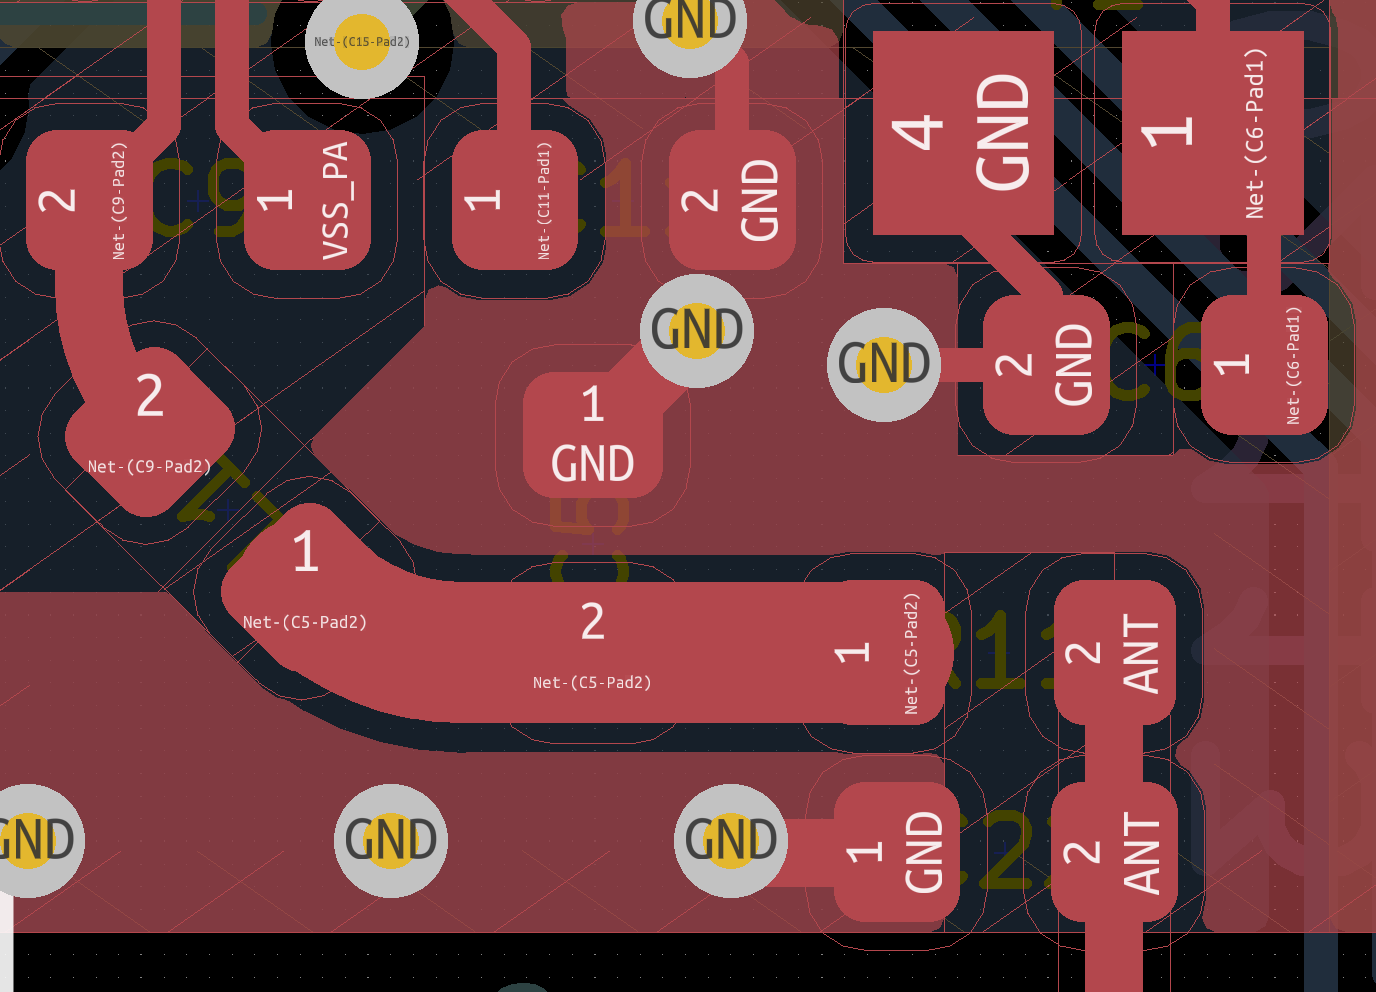
Since the design contains a controlled-impedance trace (namely the antenna feed), it is specific to a given stackup from a given manufacturer. The current design files are optimised for JLCPCB's 1.6mm, 4-layer 7628 stackup.
read: if you choose to use a different (1) board thickness, (2) manufacturer, or (3) stackup, you must modify the design accordingly to change the antenna feed (either trace width, plane separation, or both). The antenna feed uses a grounded coplanar waveguide design.
Figure 1: the antenna feed
The PCB should be manufactured with an ENIG surface finish, but it has been tested with HASL boards (run a solder wick over the pads first). All components are 0402 (1005 metric) or larger, and can be placed by hand without magnification. A stencil is mandatory — get a 100µm (0.1mm) thick one.
It's a good idea to get an electropolished stencil if you want to paste more than one board at a time, otherwise you will probably need to completely clean out the stencil before pasting another board.
All prototypes are assembled with Chipquik SMD291AX T4 solder paste.
There's no "component silkscreen" on the board except 4 lines to align the nRF chip, so use ibom.html while placing parts. It is generated using KiCad's excellent Interactive BOM plugin.
software
ZMK now has support for mikoto, as of this PR, and so does the Adafruit nRF52 Bootloader, as of this PR. Thanks to @mrninhvn for both of those. A binary version of the bootloader (0.6.3) can be found in misc/bootloaders/.
license
Licensed under the Apache 2.0 license, see LICENSE.
If you encounter any problems, feel free to open an issue on this repo. However, I am not obligated to provide any support, and you undertake any assembly/manufacturing/purchasing at your own risk.
on an AS IS BASIS, WITHOUT WARRANTIES OR CONDITIONS OF ANY KIND, either express or implied, including, without limitation, any warranties or conditions of TITLE, NON-INFRINGEMENT, MERCHANTABILITY, or FITNESS FOR A PARTICULAR PURPOSE.
In no event and under no legal theory, ..., shall any Contributor be liable to You for damages, including any direct, indirect, special, incidental, or consequential damages of any character arising as a result of this License or out of the use or inability to use the Work.

