2.0 KiB
Programming the RP2040
To upload a new firmware image on the PR2040 (the "pico" part of "pico-ice"), you need to switch to that RP2040 UF2 bootloader mode instead of the FPGA UF2 mode.
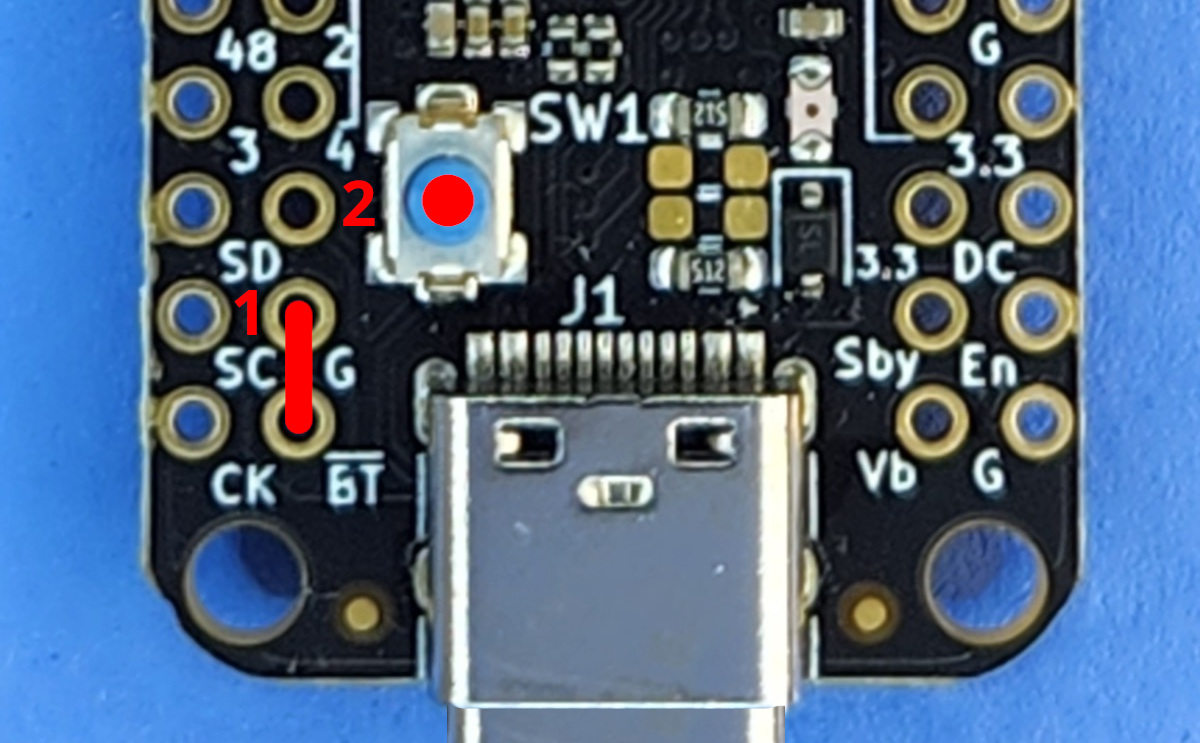
You can do that by connecting a jumper between the BT pin a Gnd pin, then press the RESET button:
-
Connect the
USB_BOOTpin to ground. For instance with a pair of tweezers, a jumper, or an uncoated paper clip. -
Press and release the "RESET" button. The RP2040 now bypasses its firmware, and runs the RP2040 factory bootloader (from internal ROM) instead.
-
Disconnect the
USB_BOOTpin from ground. -
Look for an USB drive named
RPI-RP2and mount it, open it, and check that there are only 2 files in it:INFO.HTMLandINFO_UF2.TXT. If you also have anCURRENT.UF2, this means you found the FPGA flashing interface, and need to retry steps 1 and 2. -
Copy the
.uf2firmware file onto the USB drive. -
Eject the USB drive. At this step, the firmware should be uploaded and running.
Since version v1.6.1,
it is possible to reboot the pico-ice into bootloader "BOOTSEL" mode without jumpers:
picocom --baud 1200 /dev/ttyACM0
This uses the convention established by Arduino boards which reset into bootloader mode when connecting with baud 1200.
After this, it becomes possible to use the picotool to control the firmware (upload, check version, reboot):
$ sudo picotool info
Program Information
 name:      pico_ice_default
 features:  USB stdin / stdout
Troubleshooting
RPI-RP2 is still visible after step 6
This means the device remained in "bootloader" mode.
One thing to check is that the USB_BOOT pin (marked BT on the board) is not connected to anything anymore,
then try to reset the board.
